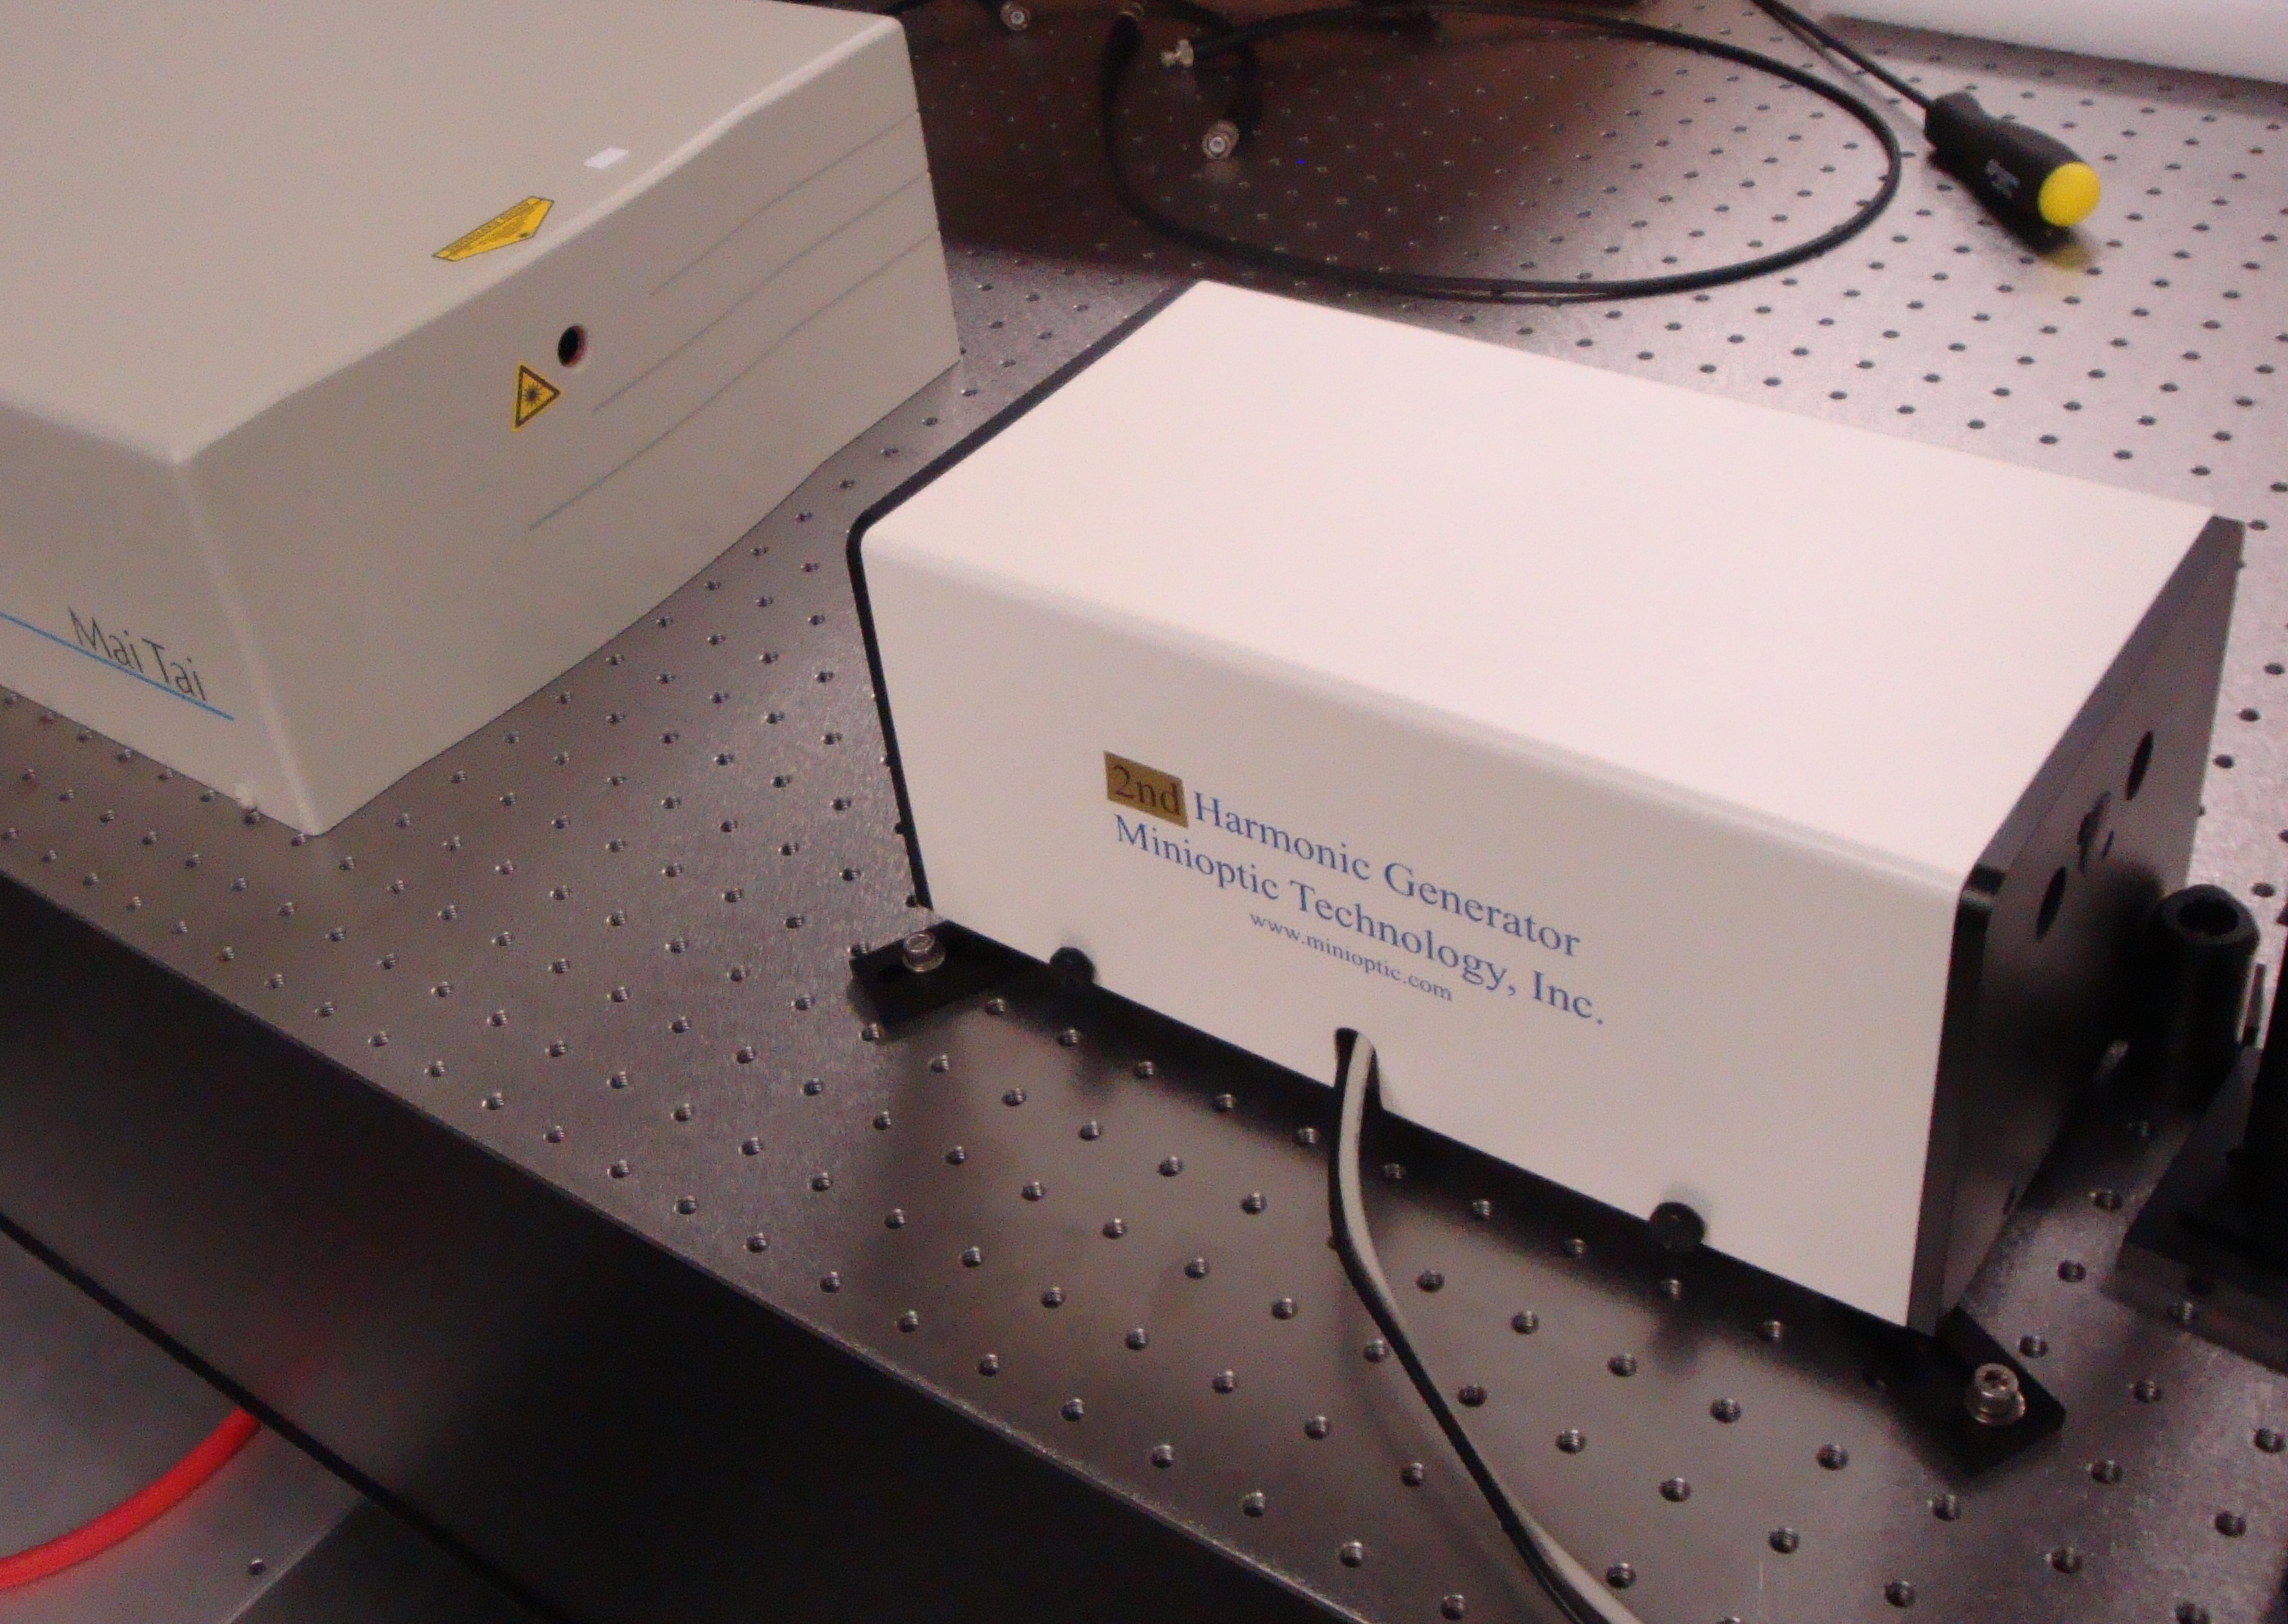
TPL Doubler
The TPL doubler is ideal devise for frequency doubling the laser pulses at 680-1060nm to generate 340-530nm pulses. The TPL doubler has unbeatable high doubling efficiency (>50%). The Auto TPL Doubler provides the hand-free computer controlled operation while the manual TPL Doubler enjoys the lower cost.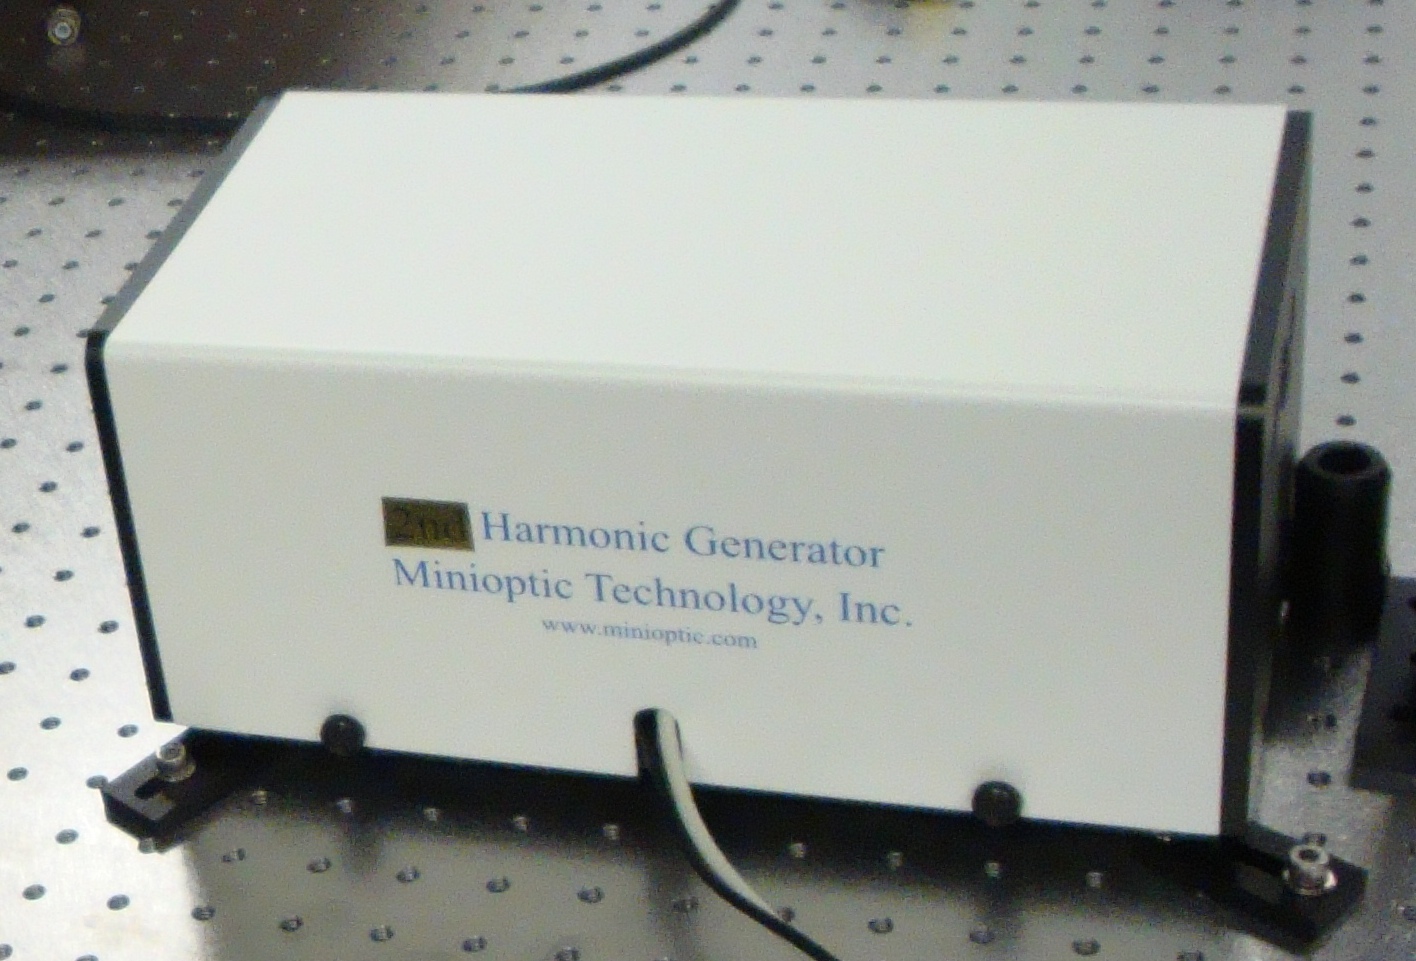
TPL Doubler is able to generate 340-530nm coherent light with input light 680-1060nm from a Ti:S oscillator laser such as Spectra-physics MaiTai and Coherent Chameleon. Second harmonic generation (SHG), also known as frequency doubling, is an important nonlinear optical process:
ω + ω = 2ω.
where ω and 2ω are the fundamental and doubling frequency respectively. SHG light at 340-530nm is attractive to numerous applications including optical data storage, optical printing, visual displays, photo lithography, and medical uses. High conversion efficiency is always preferred. SHG efficiency can be increased with increased input intensity and increased crystal length. The former invokes the need for pulsed laser sources and beam focusing; the latter increases the significance of temporal and spatial walk-off effects, which are caused by group velocity mismatch (GVM) and birefringence, respectively.
Two TPL Doubler models:
| 1 | Auto TPL Doubler Unit for hands free operation (see details below). |
| 2 | Manual Doubler unit tuning by hands still with easy operation but with lower cost. |
Specifications:
| Input Pulse width | Fs or ps pulse |
| Input Wavelength range | 680-1060nm |
| Input polarization | Horizontal (or vertical a) |
| Input pulse energy | <1nJ to 5uJ |
| Outputs wavelength range | 340-530nm |
| Output polarization | Vertical |
| SHG efficiency | Up to 50% |
| Physical dimension | LxWxH: 30x16x13 (in cm) |
| Input beam height | 4 to 5.5 inch adjustable |
| Power supplyb | 100-220V 50-60Hz plug with 5V DC |
| Scan rateb | 10nm/sec |
| Number of auto control axisb | 3: for crystal tuning, focusing, and position compensation. |
| Auto power monitorb | Yes |
| Auto SHG power optimizationb | Yes |
a. With a half-wave plate to rotate the polarization to Horizontal. b. For auto TPL Doubler only.
SHG data tested with MaiTai laser:


Auto TPL Doubler
The Auto TPL doubler is fully computer controllable unit for 680-1060nm input laser wavelength to generate 340-530nm doubling output. Change wavelength becomes a simple click of command button. The Auto TPL doubler provides hand-free operation and will benefit many applications needing automatic wavelength change. The Auto TPL doubler will well worth the small increased in cost compared to the manual doubler.
New features in the Auto TPL doubler:
– A build-in SHG power sensor
– SHG power monitor system to automatically track the SHG power
– Auto optimization function to make sure the best performance of the doubler
– Auto compensation unit to have constant output beam position in the whole wavelength range
Auto TPL Doubler controlling program
Auto wavelength scan
The controlling program is complete and user friendly. As shown in the Run page of the controlling program the wavelength can be changed in the input wavelength window or by
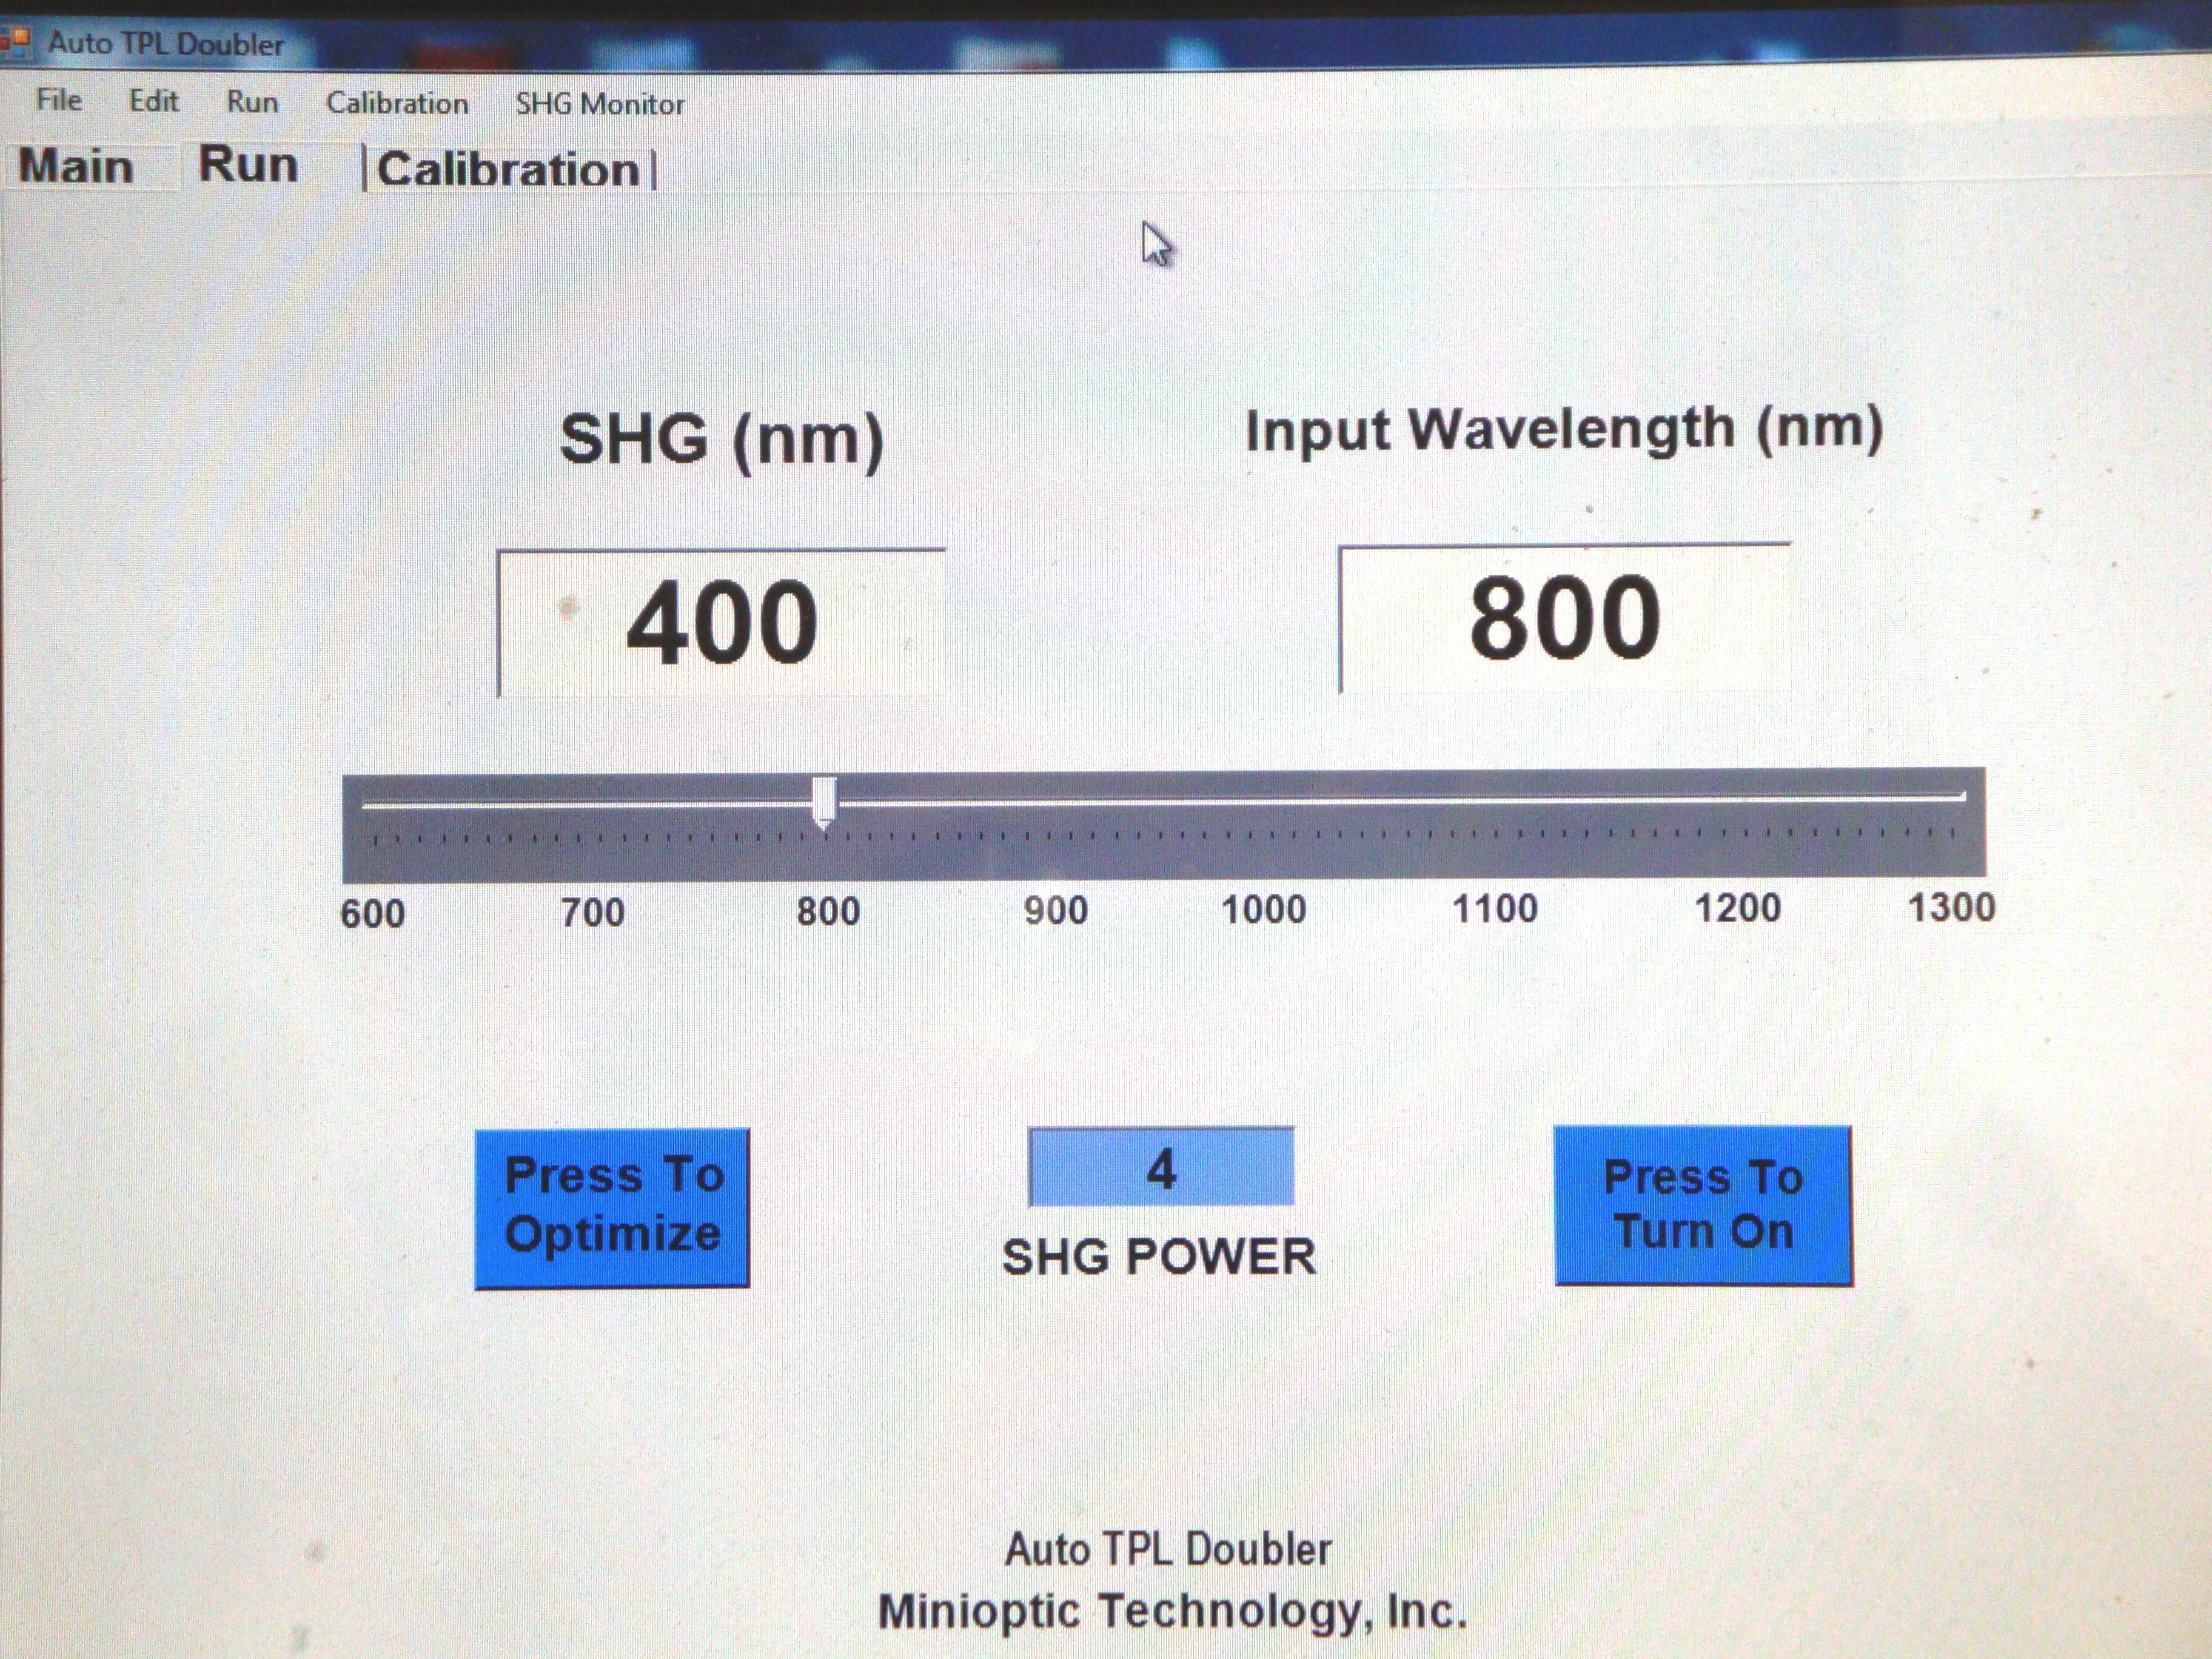
moving the track-bar. Type-in a new input wavelength then press the Enter-key or moving the track-bar will start to move the doubler to the new wavelength. It is so simple to change a wavelength.
Auto Doubler Control Panel
The control panel has three main pages: Front Page, Run, and Calibration pages.
Front Page: shows the company name and the model of Auto SHG
Run page: the major page for wavelength auto scan. The run page contains the wavelength indicators, the TrackBar for wavelength scan, the command buttons, and the SHG power indicator.
SHG wavelength indicator shows the SHG wavelength in nm.
Input wavelength indicator shows the input laser wavelength in nm. The wavelength can be changed in the text window. Press the return key will start to scan the doubler to the input wavelength calculated according to the data saved in the calibration table. The input wavelength range is from 680nm to 1060nm and the SHG wavelength range is 340nm to 530nm.
TrackBar can also change the wavelength and scan the doubler to the input wavelength. The wavelength is calculated according to the data saved in the calibration table.
Turn On/Turn Off Button turns on or turns off the motor controller.
Optimize Button starts the optimization process to find the best motor positions for the maximum SHG power. The motors to be optimized are selected by the menu bar Run/ Option for Optimization. The motors and three position ranges can be selected.
Controller Indicator shows the On/Off statue of the controller.
SHG Power Indicator displays the relative SHG power when the SHG monitor is turned on in the menu bar THG monitor/ Turn On Monitor.
Calibration page: has the calibration table containing the calibration data for scan the wavelength. The page also has the motor controller for each motor to move the motor manually.
Calibration Table: the table contains the data of each motor position at each laser wavelength after optimized the SHG power. Each row has a set of motor position data for one input laser wavelength. The first column is the wavelength, the second column is the motor A position, the third column is the motor B position and so on as indicated by the title of each column. Every 10nm may have a set of the calibrated data. The motor positions corresponding to each input laser wavelength is calculated and moved according to the data in the table.
Add Data button: The data can be added to the table by Press Add Data button. The Calibration data can be deleted using the Edit menu Cut function. The data can be added or deleted only in a data set having one wavelength and positions of each motor (6 motors total). Note the old data set will be replaced by a new data set if the wavelength of the new data set is same as that of the old data set.
Reference position: the motor reference positions are set for 800nm laser wavelength. The reference position can be changed by using the menu bar Calibration/change reference position (800nm). Change reference position will led to whole column of motor data shift a same amount of position determined by the difference of the new position and the old position at 800nm for each motor.
Change Motor direction: the motor can be moved in a positive direction with the motor position increasing with the wavelength increasing or in a negative direction with the motor position decreasing with wavelength increasing.
Motor controller: there are two motor controllers to move or scan the motor position separately. Motor A is for SHG phase match angle controlling, and Motor B for controlling the focal distance of the SHG focal lens to the SHG crystal. The motor controller is for manually moving the motor.
Wavelength window: the wavelength can be changed to the input laser wavelength by the change of the number in the window or by moving the Trackbar.
Menu Bar: has File, Run, Calibration, SHG Monitor.
File/Open: to open the calibration data file.
Close: to close the control program.
Save: to save the calibration data to the same file name.
Save As: to save the calibration data to a different file name.
Exit: to exit the control program.
Run/Go Home: to move the selected motors to the home (zero) position, and then move to the last motor positions.
All Motors: press to go home for all motors.
Motor A (SHG): press to go home for motor A.
Motor B (focus): press to go home for motor B.
Run/Do Optimization: Press to start the process to optimize the selected motor position for maximizing the SHG power. The motor and the range are selected in the Option for Optimization menu bar.
Run/Turn on: to turn on the motor controller
Run/Option for Optimization: each motor or all the motors can be checked or unchecked and three position ranges (Large, Medium, and small ranges) can be selected for the optimization process. Most time the medium range is good enough.
Calibration/Open Table: to open the calibration data table in another window page.
Open Calibration File: to open a calibration data file to the calibration table.
Add Data to Table: to add a set of motor position data optimized at one wavelength to the calibration table.
Cut A Row from Table: to cut a set of data to the selected wavelength (Row).
Change Reference Position (800nm): Press to change the selected motor reference position. The motor reference positions are set for 800nm laser wavelength. Change reference position will led to the whole set of data of the selected motor to shift a same amount of position determined by the difference of the new position and the old position at 800nm for each motor.
Motor A (SHG), Motor B (focus), All Motors
Change Motor Direction: Press to change the selected motor direction. The motor can be moved in a positive direction with the motor position increasing with the wavelength increasing or in a negative direction with the motor position decreasing with wavelength increasing.
Motor A (SHG), Motor B (focus)
SHG Monitor/Open Graph: press to open the graph of the relative SHG power. The graph will show the SHG power in seconds (up plot), minutes (middle plot), and hours (bottom plot).
ReStart Graph: to clean the previous data in the graph and start to show the new data of the THG power.
Change Graph Scale
Top Plot Maximum: press to input/change the Y-axis maximum of the top plot.
Top Plot Minimum: press to input/change the Y-axis minimum of the top plot.
Bottom Plot Maximum: press to input/change the Y-axis maximum of the middle and bottom plots.
Bottom Plot Minimum: press to input/change the Y-axis minimum of the middle and bottom plots.
Turn On/Off Monitor: Press to turn on/off the sensor of the SHG power monitor.
High/Low Sensitivity: Press to select the high (100 times) sensitivity or the low (1 time) sensitivity for the sensor of the SHG power monitor.
Measure Background: To measure the background signal without the SHG power. The measured SHG power will subtract the background signal.